

These pinafores have been bugging me for some time as they didn't turn out quite how I wanted... While I liked the versatility of the long sash running through the casing, which could be adjusted to cinch and ruffle more or less depending on the size of the child, I also wanted the ruffles to stay ruffly once you got them set. Instead, the pinafore body would stretch out along the sash and become straight all the way around. Make sense? I pondered two ideas that might make it stay ruffly...sticking the sash through the casing, ruffling it just right to make it fit the child it was for, then sewing the sides of the pinafore to the sash. Or, putting elastic inside the casing instead of a fabric sash. I ended up trying the elastic and the following is how I did it. It is basically the same as the other pinafores, but with some slight modifications. It stays ruffly how I wanted it to so I would do it this way again, or the other idea to sew the sash to the pinafore at the sides would work about the same too. Let me know if you make one of either variation...I have no kids so I sew based on the measurements I hound my sisters for (they are great sports and supporters and usually end up getting some freebies along the way). Comments on fit, suggestions to make the idea better, etc. would be greatly appreciated. So, without further ado...let's get started! Oh...one more thing...I know what you're thinking before you even think it...She needs a new ironing board cover...trust me...it's next on my list of projects (or somewhere close to the top)!
Sizing for this will fit approx 1-3 year old - the body is 12" long (this would be the distance from under your child's armpit to where it would fall on the leg) and the top wraps around fitting a minimum chest circumfrence of approx. 16" and maximum of approx. 24."
Pick 2 coordinating fabrics.
Cut:
- skirt - 16 1/2" X 25 1/2" (purple floral)
- sash (2) - 3 1/2" X 18" (purple and coral waves)
- straps (4) - 2 1/2" X 18" (purple and coral waves)
- 3/4" wide elastic (16 inches long)
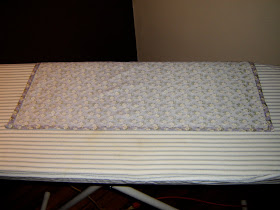
Lay large fabric piece (in my case, the purple floral) on your ironing board right side down. Turn short sides under 1/4 inch and press. Turn these same edges under 1/4 inch again and press. Stitch along both of these short edges where you've pressed.


Lay large fabric piece on the ironing board again, right side down. Turn under one of the long edges 1/4 inch and press. Turn this same edge under another 1/4 inch and press. Stitch along this long edge where you've pressed.

Lay large fabric piece back on the ironing board, right side down. Turn under the remaining long edge 1/4 inch and press. Fold in another 3 inches of fabric in the same direction and press flat.

Stitch down the fold, 7/8 inch from the bottom edge, to create the bottom edge of the elastic casing.

Use a yardstick and a disappearing ink pen to draw a line across piece of fabric, 1 inch from the top edge.

Sew along this line all the way across to create the top edge of the elastic casing.

Secure a safety pin to each end of the elastic. Use these pins to inch the elastic through the casing (and to help you pull the elastic back if it gets lost inside the casing where your hand can't reach).

Leave a little bit of elastic sticking out both ends and move the safety pins just inside the edges of your fabric piece so the elastic is secured exactly where you want it and won't move when you sew.

Sew through the elastic and fabric on both ends about 3/4 inch away from the edge of the pinafore. Then trim the excess elastic at each end.

Put the pinafore fabric piece aside so we can now make the sash that will tie in the back...
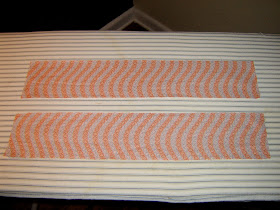
Lay the two sash pieces on the ironing board right sides up.

Fold each piece in half lengthwise so wrong sides are showing. Press.

Sew around three of the sides on each sash with a 1/4 inch seam allowance. Clip corners.


Using a tweezer, turn both sashes right side out. Press. Top stitch along all sides about a 7/8 inch from the edge.

Grab one of the sashes you just made. Insert one end of it into the opening where the elastic casing is (there is not much room, but try to get the end of the sash in as far as possible).

Stitch 1/4 inch from the edge of the pinafore, catching both the sash and the pinafore.

Now we're going to make the shoulder ties. With the four fabric pieces, sew these just as you did the sashes. If you want to save some time, you could use bias tape instead of making ties out of fabric.

Pin these to the pinafore in four separate spots (two in the front, two in the back). Sew the straps to the pinafore by stitching in a square to reinforce).

All done!

No comments:
Post a Comment