

Pick 3 coordinating fabrics.
For a child 1-3 years, cut:
- skirt - 16 1/2" X 25 1/2" (multi-colored floral)
- front of sash (2) - 2" X 25" (pink and white dots)
- back of sash (2) - 2" X 25" (solid pink)
- straps (2) - 2 1/2" X 24" (pink and white dots)
- optional pocket -3" X 3" (solid pink)
For a child 4-6 years, cut:
- skirt - 19 1/2" X 28 1/2" (multi-colored floral)
- front of sash (2) - 2" X 25" (pink and white dots)
- back of sash (2) - 2" X 25" (solid pink)
- straps (2) - 2 1/2" X 28" (pink and white dots)
- optional pocket - 5" X 5" (solid pink)

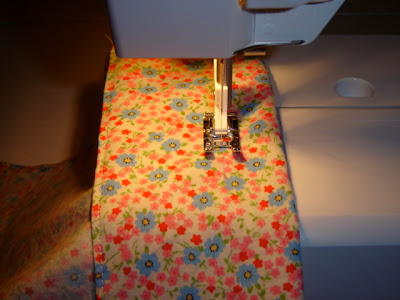
Lay large piece of multi-colored floral fabric face down on ironing board. Turn short sides under 1/4 inch and press flat; sew.

Lay fabric back on ironing board right side down. Turn one of the longer sides under 1/4 inch and press.

Fold in another three inches of fabric in the same direction and press flat. Make sure all layers are even so it looks clean from the front when you go to stitch the layers together.

Stitch down the fold, 7/8 inch from the bottom edge, to create the bottom edge of the sash casing.

Use a yardstick and a disappearing ink pen to draw a line across piece of fabric, 1 inch from the top edge.

Stitch along this line to create the top edge of the sash casing.

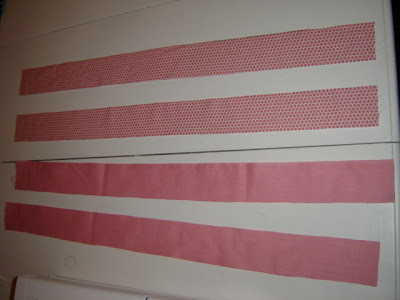
Gather the four strips you cut for the sash - two from the pink and white dots fabric and two from the solid pink fabric (shown in photo). Sew like fabrics together at the short ends to create two long strips.

Fold all raw edges (sides and ends) under 1/4 inch; press.

Pin the strips together, right sides out.

Stitch around all sides, 7/8 inch from the edge.

The fabric may start to bunch as you stitch. Taking out the pins well ahead of time and realigning the fabric will help some. However, you may want to stop stitching when you reach the mid-point of the sash. Begin stitching again from the opposite end, meeting first stitch line in the middle of the sash. You will end up with a small crease in the middle of the sash, which will be hidden in the casing anyways. I prefer this method as it creates a crisper crease along the edge. You may instead try this alternate method - Pin strips together wrong side out. Stitch around three sides leaving one of the short ends open. Using a tweezers to slowly pull the fabric out of the open end, turn the strip right side out. Press sash flat and sew around all four sides 1/4 inch from the edge.

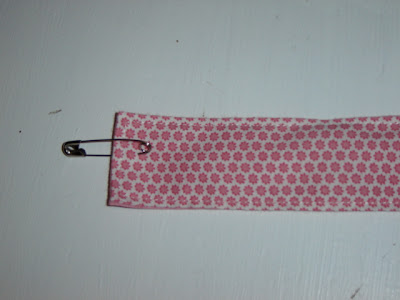
Attach a safety pin to to one end of the sash. Use the pin to help you inch the sash through the casing.


Gather the two strips you cut for the shoulder straps. Fold each in half lengthwise; press. Sew all around 1/4 inch from the raw edges, leaving one of the short ends open. Using a tweezers to slowly pull the fabric out of the open end, turn the strip right side out. Press strap. Sew around all four sides 1/4 inch from the edge. Cut each strap into two equal sections.

Turn the pinafore face-down on a flat surface. At the top, mark the center with a disappearing ink pen. Place one strap two inches to the left of the center, and the other strap two inches to the right of the center. Pin end of strap down about one inch from the top edge. Sew across bottom of straps to secure to body.
Pin the other two straps one inch from each side of the outer edges of the body. You now have straps that you can tie at the shoulder for complete adjustability.

Turn under bottom of skirt 1/4 inch and press; sew. Fold pocket fabric under 1/4 inch on three sides; press. Fold under 1/2 inch at top of pocket; press.

Sew decorative rickrack along the top edge of the pocket (optional). Sew the pocket onto the front of the pinafore where desired.

Embellish with buttons, fabric yo-yo's, flowers, etc. if desired.
All done!!

The measurements given are approximate as the pattern still needs additional testing. I would appreciate any photos, comments, or suggestions you have while making your own pinafores. Please email to fortandfield@mac.com and I will add to the tutorial. Thanks and happy sewing!!
I was honored to have this tutorial featured on the Sew Mama Sew blog in a recap of some of the great kids' clothes sewn during Kids' Clothes Month (September). My two nieces (daughters of my oldest sister) modeled the pinafores. They're the cutest (the girls, not the pinafores)!

this is really cute! I can
ReplyDeletet wait to try it out for my little girl once she's born! :)
Wow, I love this pattern! My girls (1, 3 & 5) would LOVE to have this in their closets for spring/summer! I hope mine will turn out as nicely as your photos :) !!
ReplyDeleteThanks so much! I would love to see pictures when you are done making them for your girls!
ReplyDeletehi there.I just wanna say thk u for sharing this tutorial.I made 1 for my 3 years old girl and its really look good on her.I'm so happy because i'm not a tailor but this work perfectly!i really love it cant stop looking at it..thks!
ReplyDeleteHi Checkie,
ReplyDeleteI am so glad you liked the tutorial...don't you just love it when you finish something and you can't stop looking at it?!...that's when you know it looks good :)
its very true..;)
ReplyDeleteThis is a cute pinafore. I have a question: is it open in the back, or sewn shut? From the tutorial, it seems to be open in the back except for where the sash is tied?
ReplyDeleteSo sorry it took me so long to post a reply. The pinafore is open in the back except for the sash where it is tied. Kids can wear with a t-shirt or tank underneath or leave as is for hot summer days.
Delete